
This post may contain affiliate links. If you click on a link and make a purchase, I may receive a small commission at no extra cost to you. For more information, please read my disclaimer here.
Ah, wintertime! The snow is falling, the temperatures are dropping, and you’re stuck inside with your preschoolers with nothing to do.
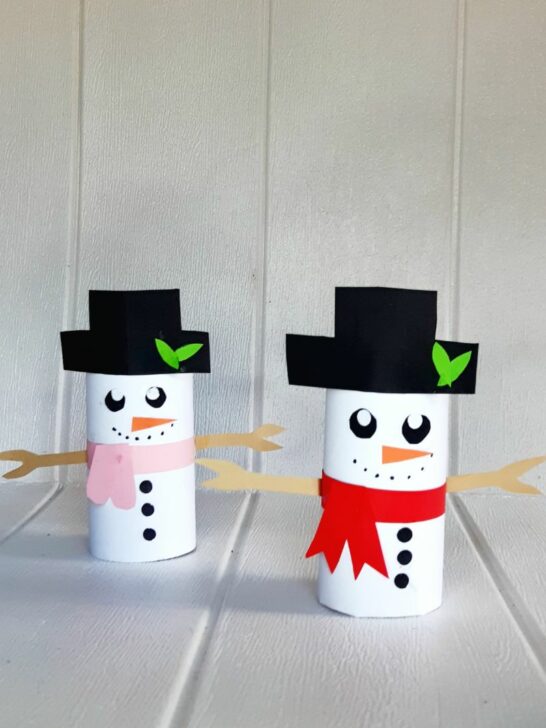
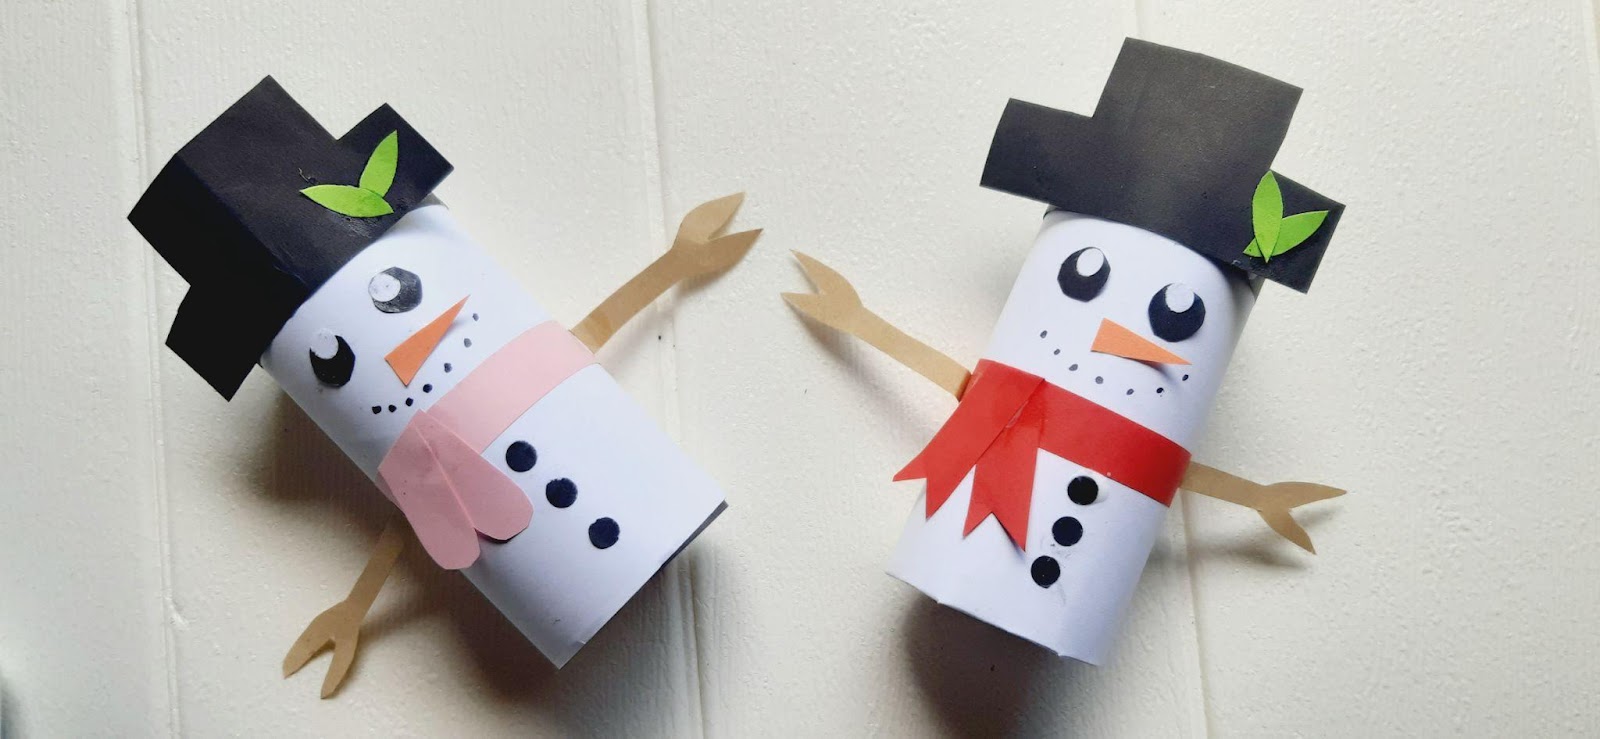
Never fear — you can always turn to good old-fashioned crafts to keep everyone entertained. And what’s more wintery than a toilet paper roll snowman?
A toilet paper snowman is easy and inexpensive to make, and you can make as many as you’d like! They’re perfect for those days when the snow is too slushy to build a real one outside.
Plus, they’re just plain cute. Here’s how you can make your own toilet paper roll snowman to use as decorations or as gifts.
Things to Remember When Making Crafts with Preschoolers
When you’re crafting with preschoolers, there are a few things to keep in mind:
- Safety first! Make sure all materials are safe for little hands to use. Supervise closely, especially with young children who may put things in their mouths. You can even cut out everything in advance so they just assemble to the snowman craft too!
- Keep it simple. Don’t try to make something that’s too complicated or involved. Preschoolers have short attention spans, so the simpler, the better.
- Let them be creative. It’s okay if their toilet paper snowman doesn’t look exactly like yours. In fact, it’s better if they put their own spin on it!
Toilet Paper Roll Snowman Materials
You will get the best results with a paper roll that is not yet crumpled and some crafty basics to pull this project together. You can just draw the eyes of the snowman or use a white paper cutout. And if you have spare googly eyes, you can use them too!
The parts used to decorate each toilet paper snowman will need to be prepared by grown-ups. You will also need to assist younger children with getting everything glued on.
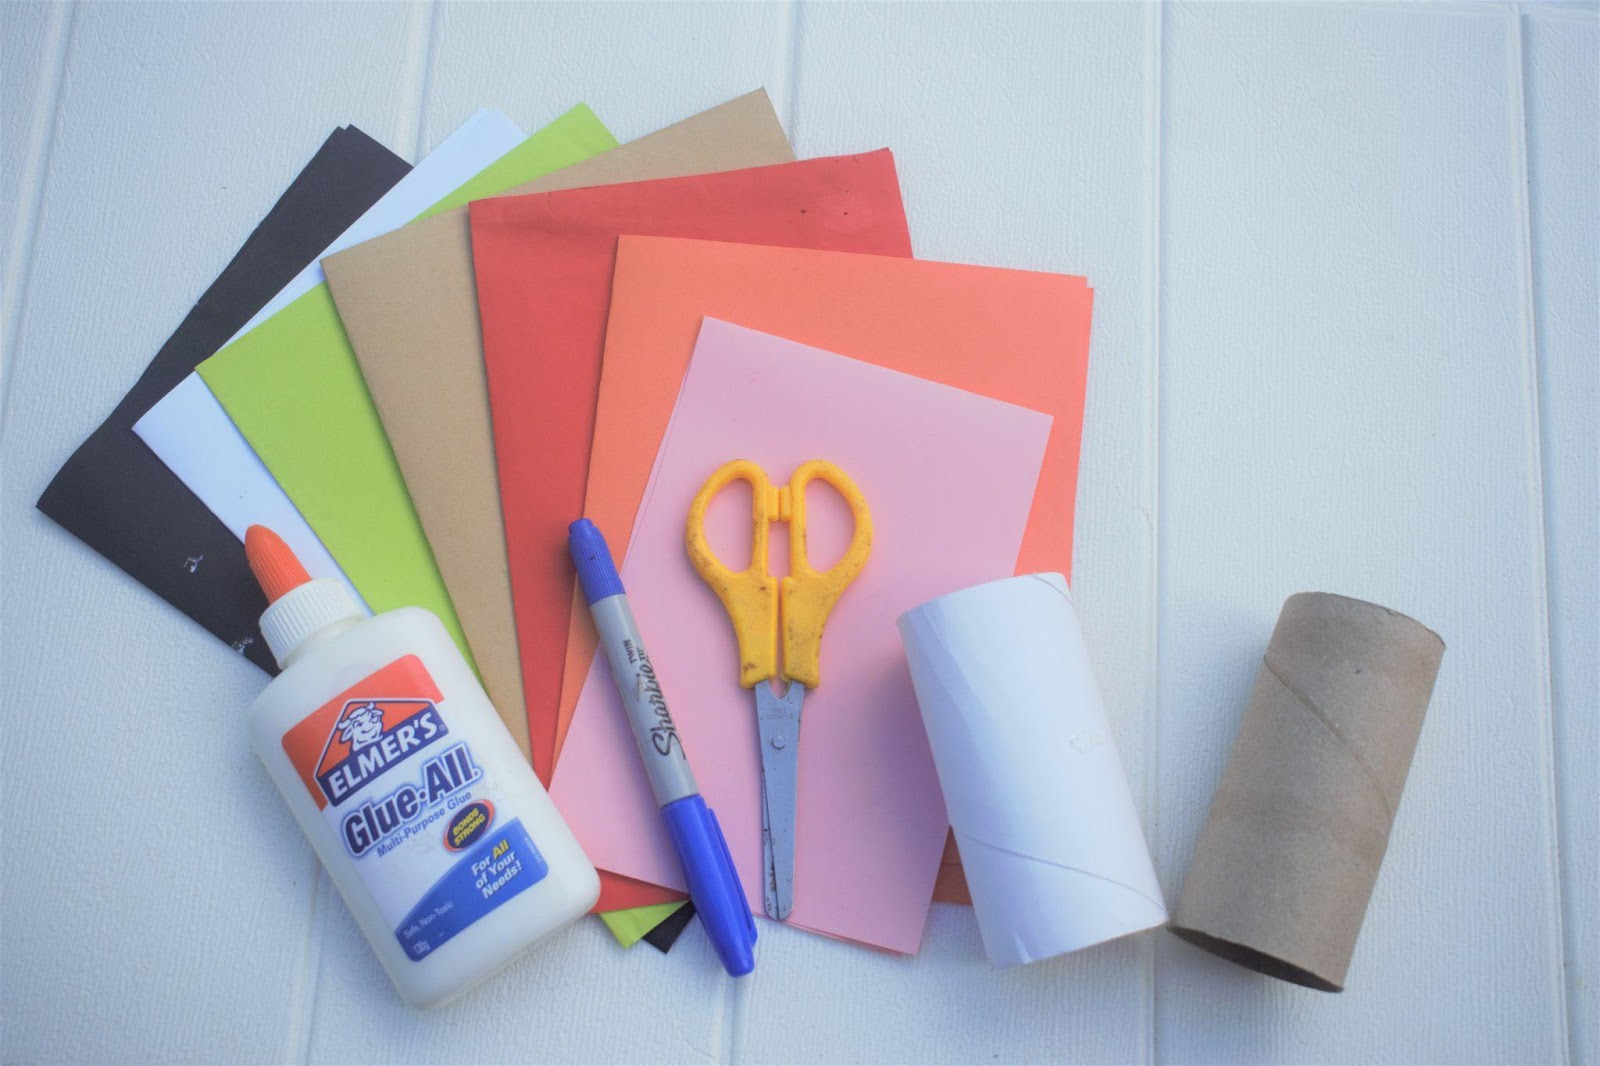
- Paper roll
- Black Marker
- Glue
- Colored Paper (Brown, Orange, Red or Pink, and Green)
- White thick Paper
- Scissors
Here’s How It Works:
Stage 1: Create Body Parts and Accessories
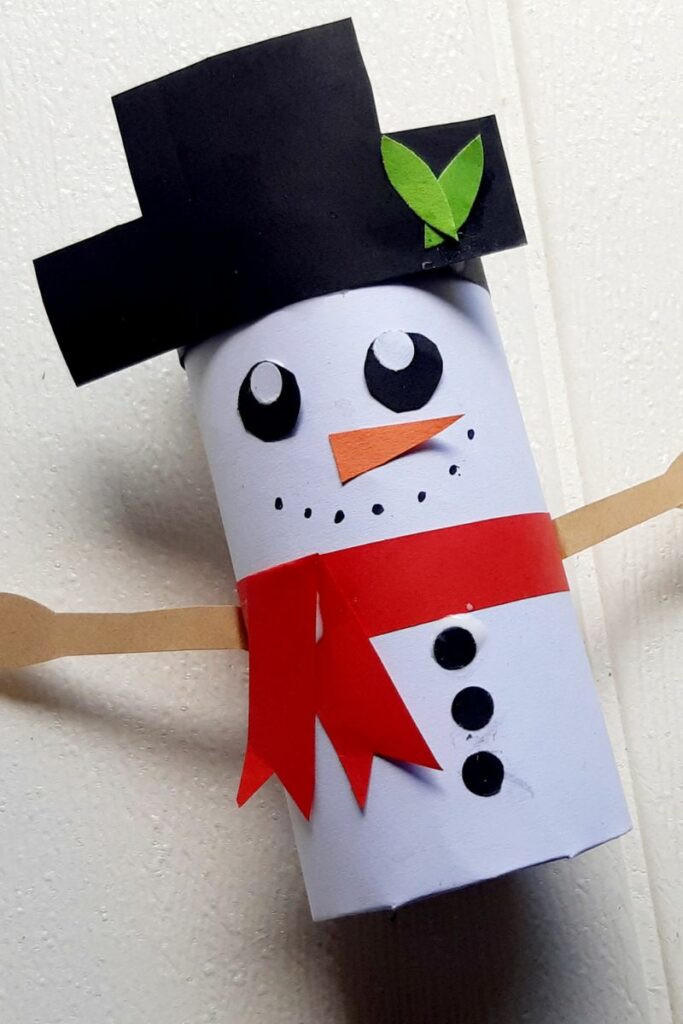
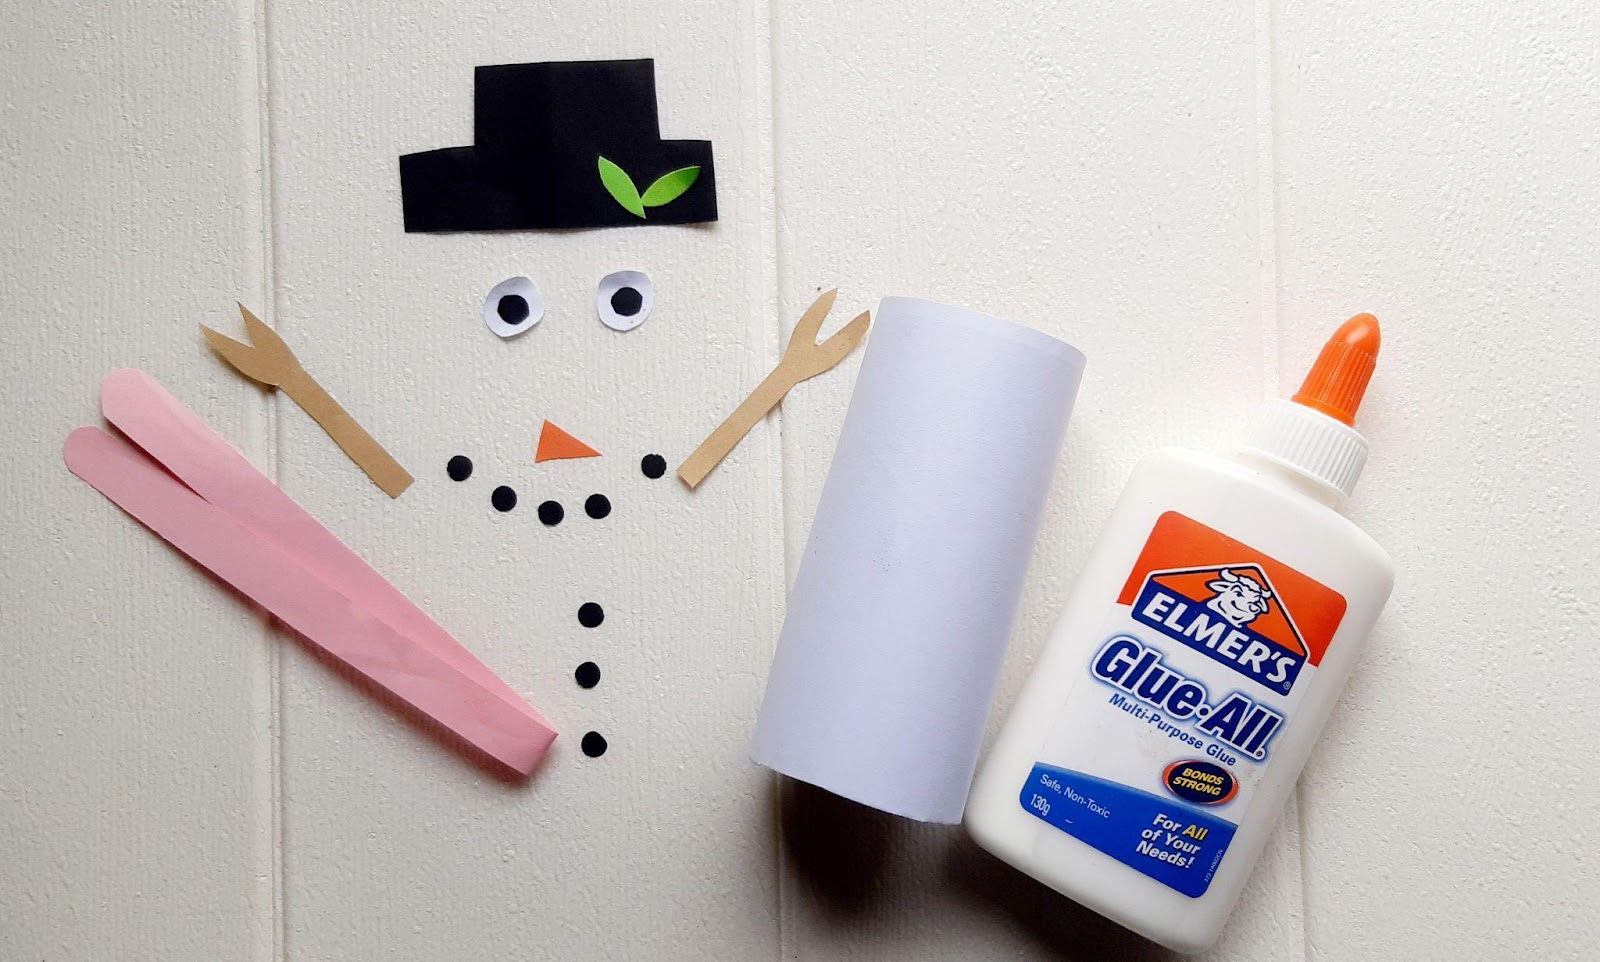
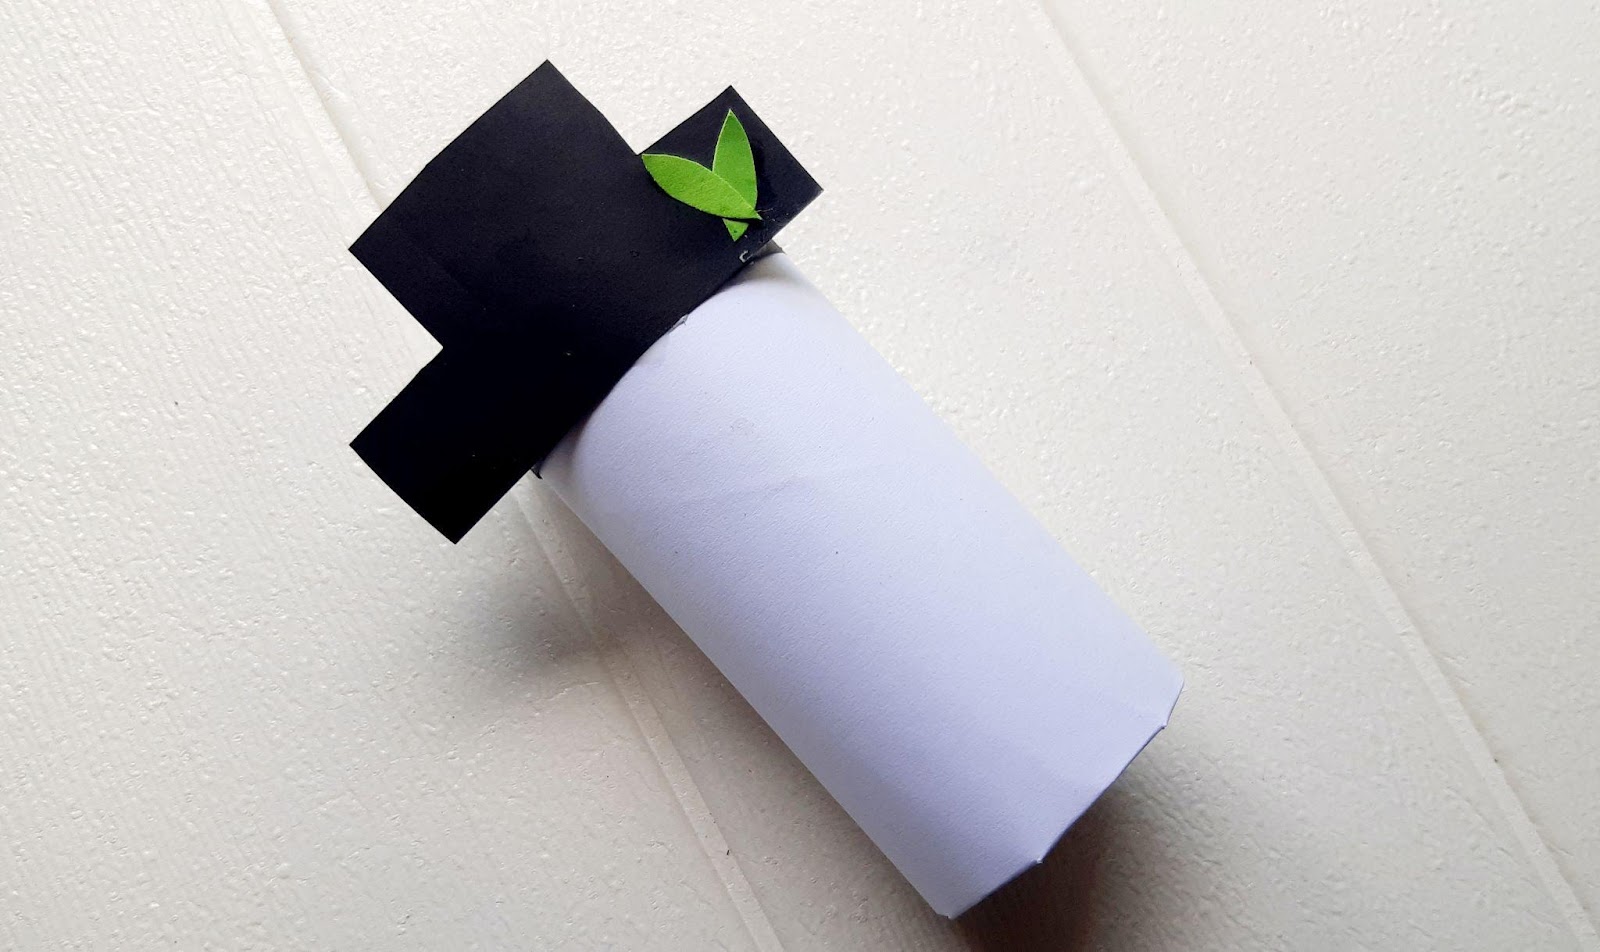
STEP 1: Cut a black-colored paper and make a hat with an ornament of green leaves on the side. Follow the shape below.

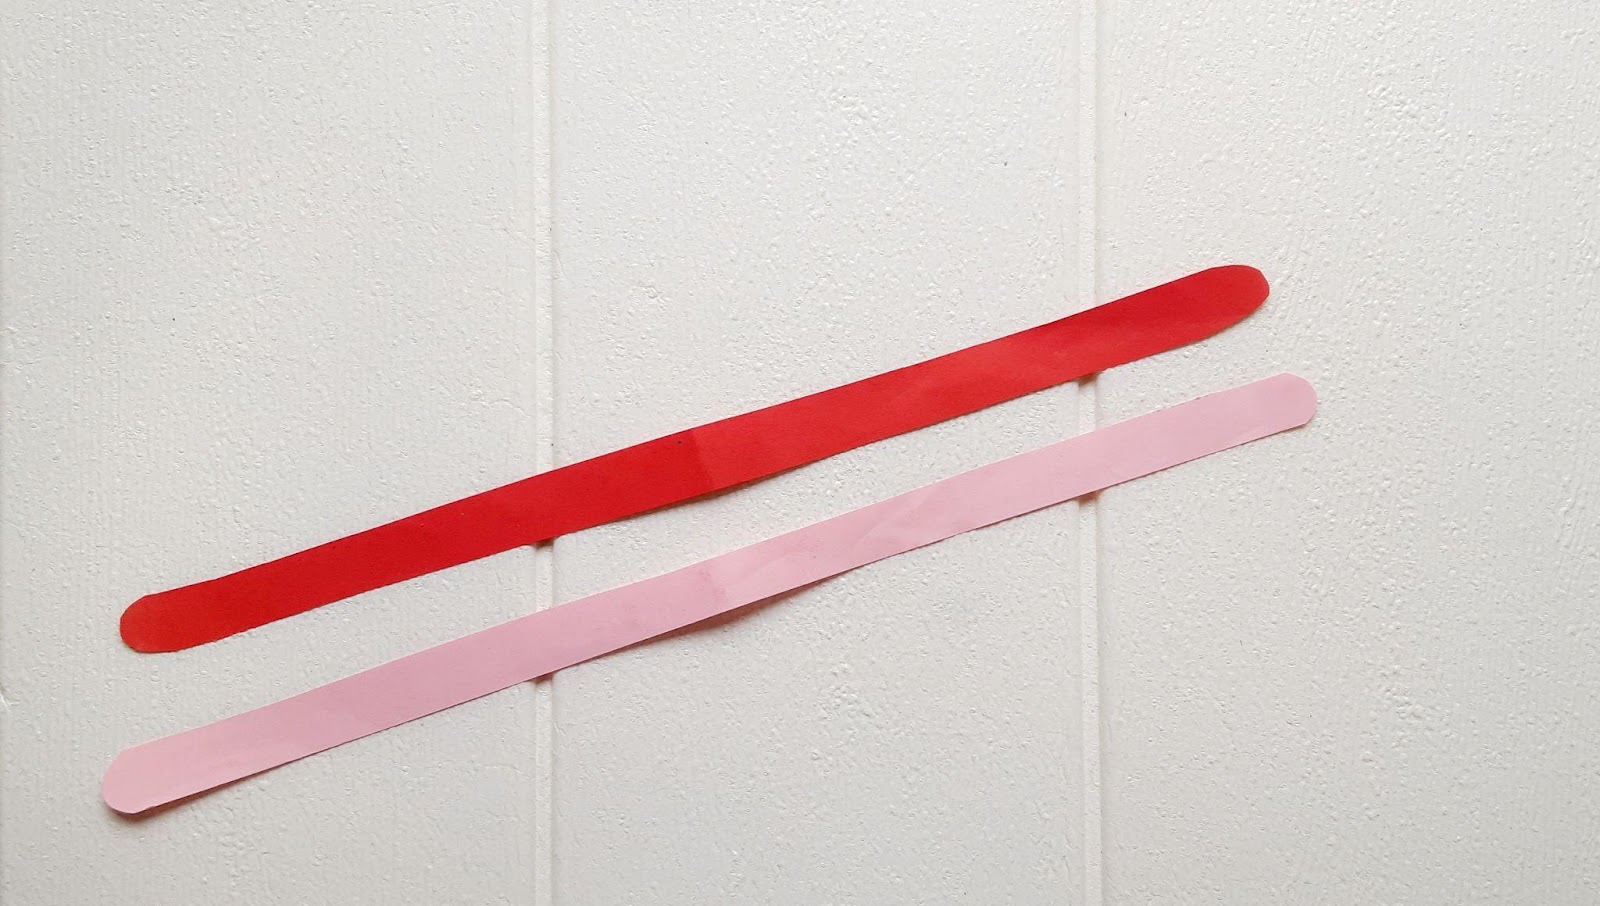
STEP 2: Cut your preferred colored paper strips like below. Either one can be the scarf of your toilet paper roll snowman. Let your kid choose the color!
We picked red or pink because these stand out against the white body of the snowman. Plus, red is a favorite Christmas color.
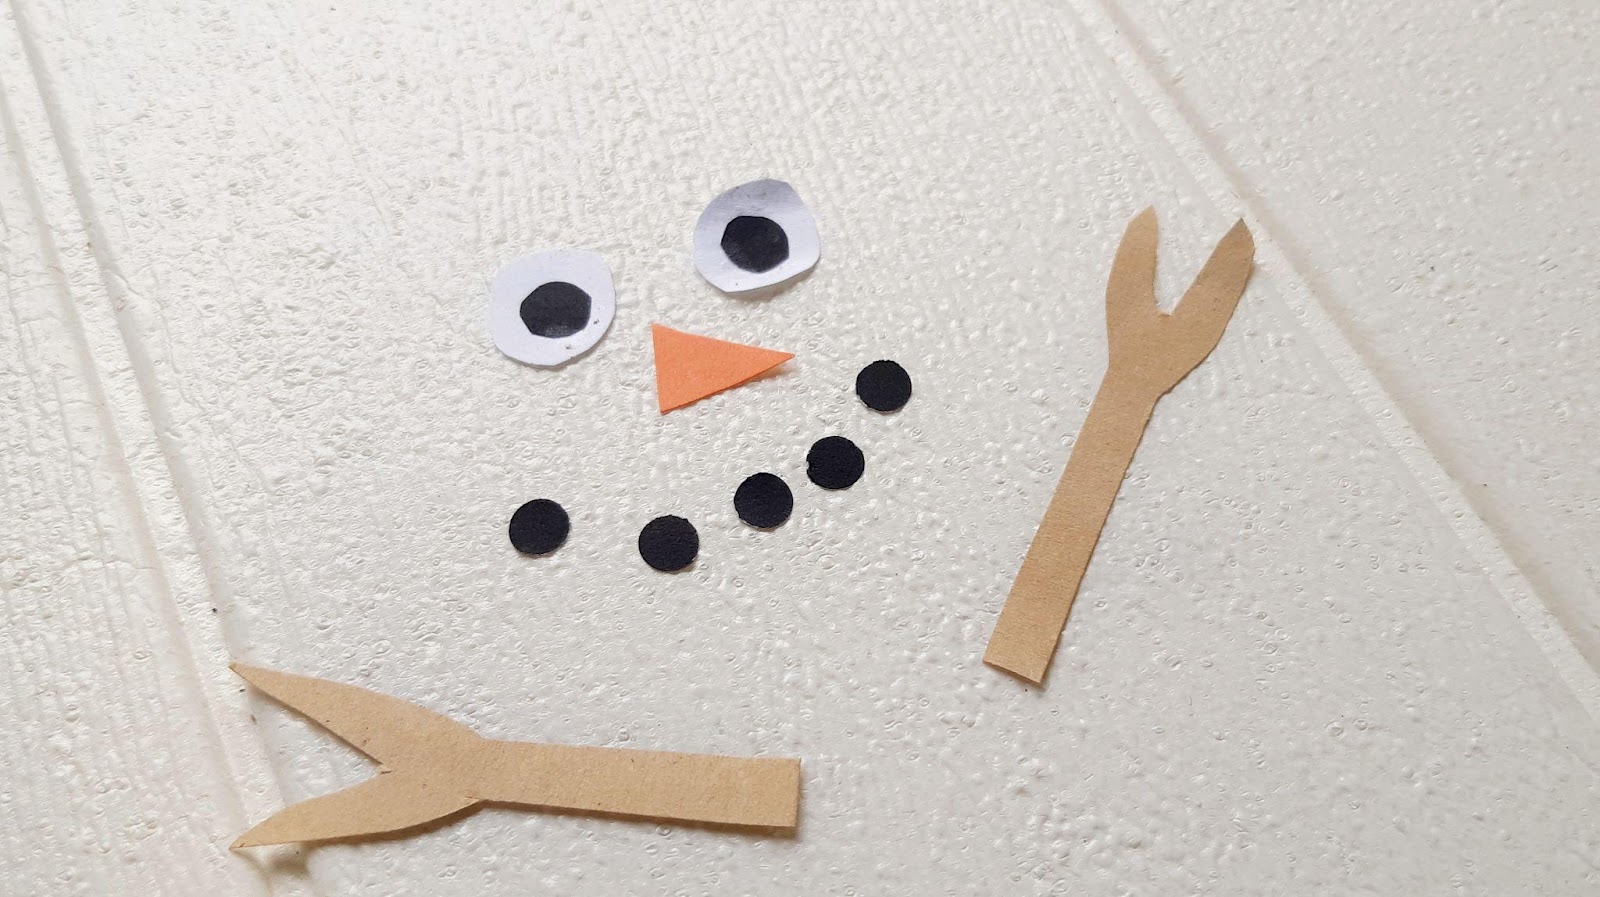
STEP 3: Cut a small triangle using orange paper. It will serve as the carrot nose of your paper roll snowman. Then, draw two twigs like below using brown colored paper.
For the eyes, you can paste googly eyes, draw them directly to the paper roll, or cut your own preferred eyes for your snowman.
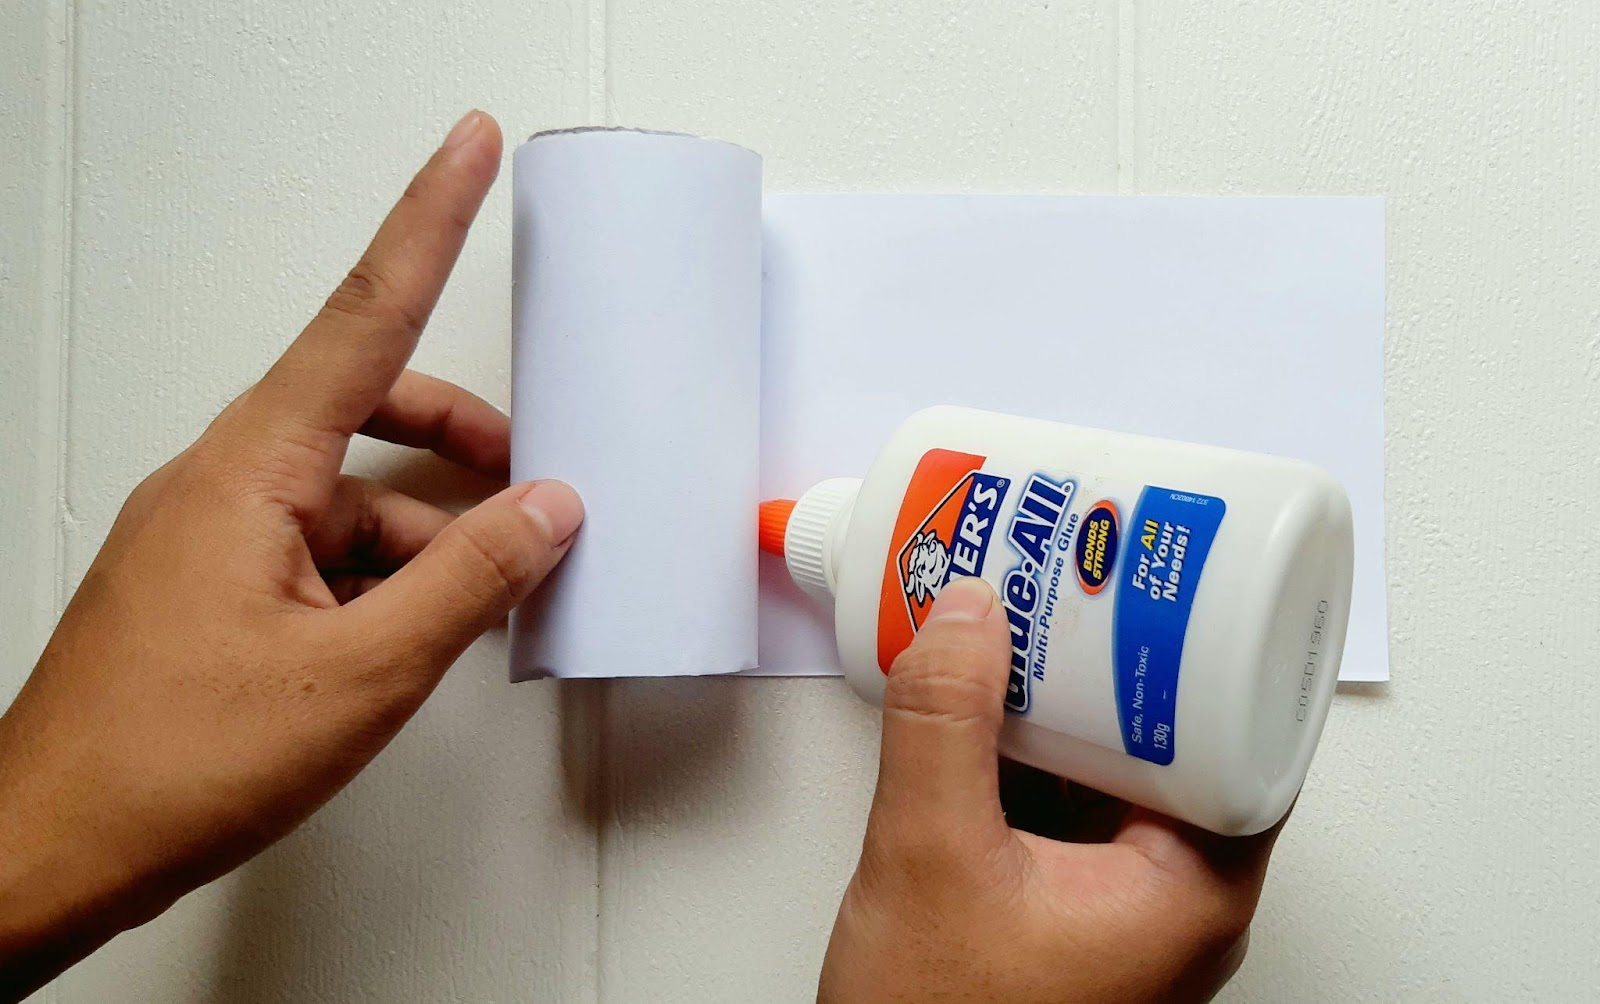
STEP 4 – Wrap your paper roll with the white paper for a smooth texture and to imitate the snow-like feature.
Now, we’ve completed all of the parts. Ready to assemble?
Stage 2: Assemble Your Toilet Paper Snowman
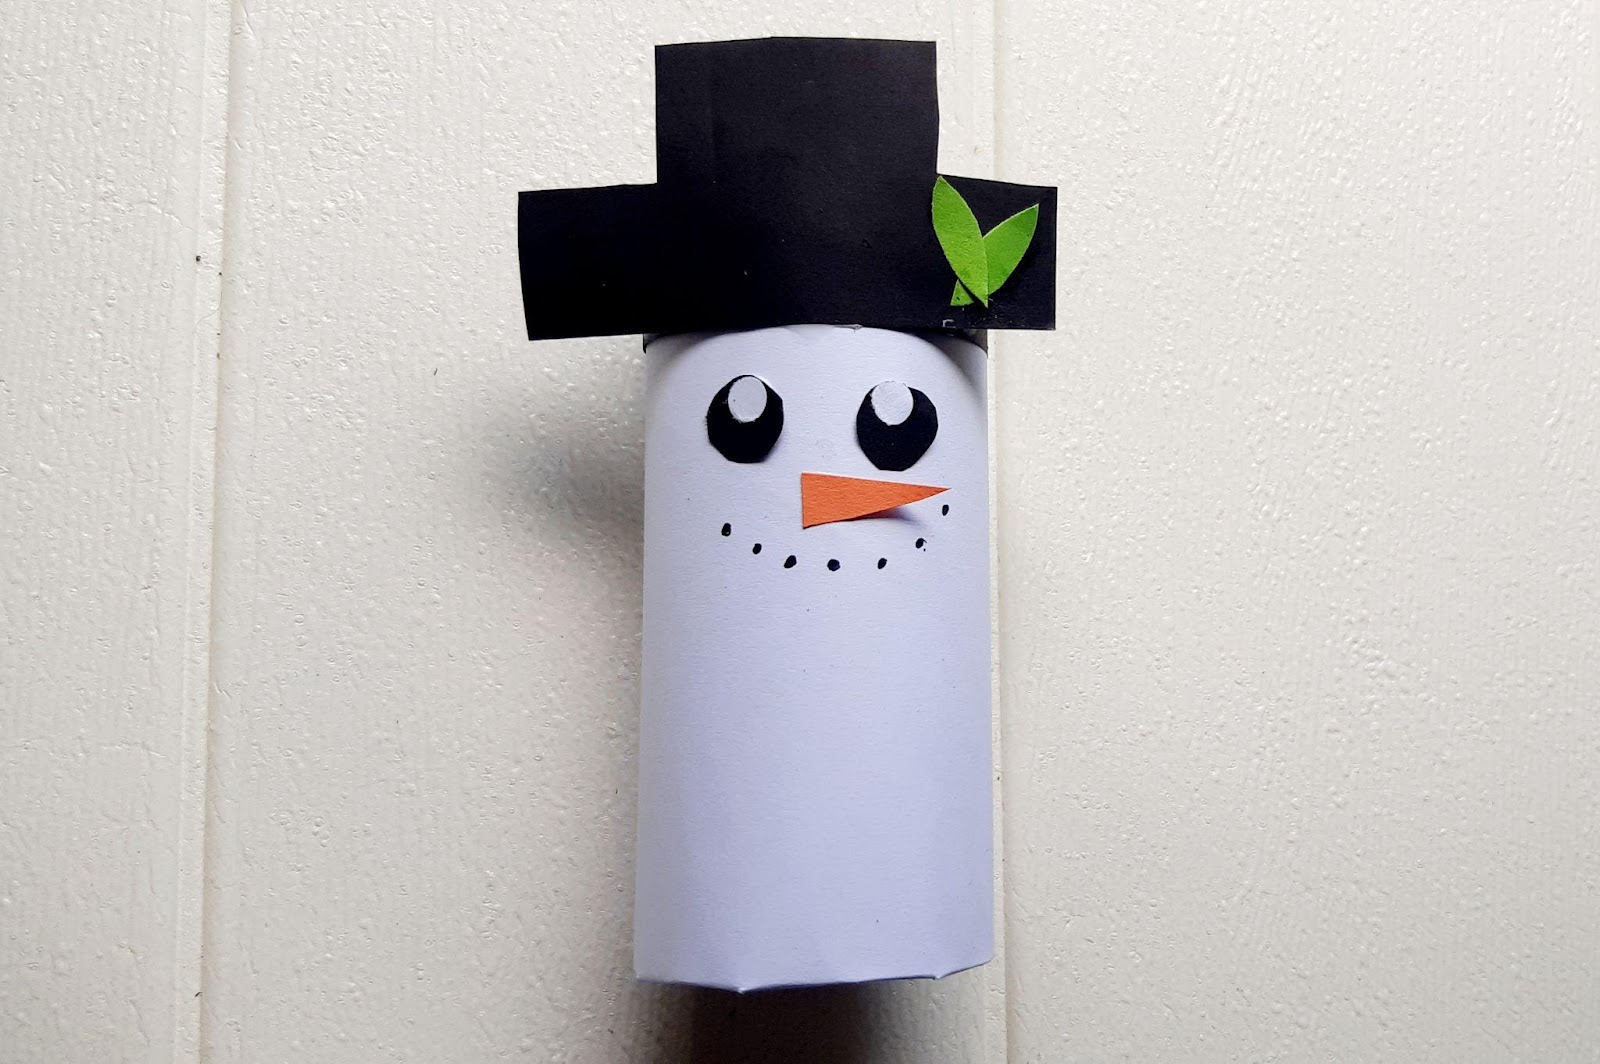
STEP 5 – Paste the snowman hat to the top of the roll. You can also add other preferred ornaments to the hat, like a pipe or a feather!
STEP 6: Paste the eyes and the orange nose where you want the face to be. Then, use a marker to draw a dotted smile. This will make our snowman even more adorable!
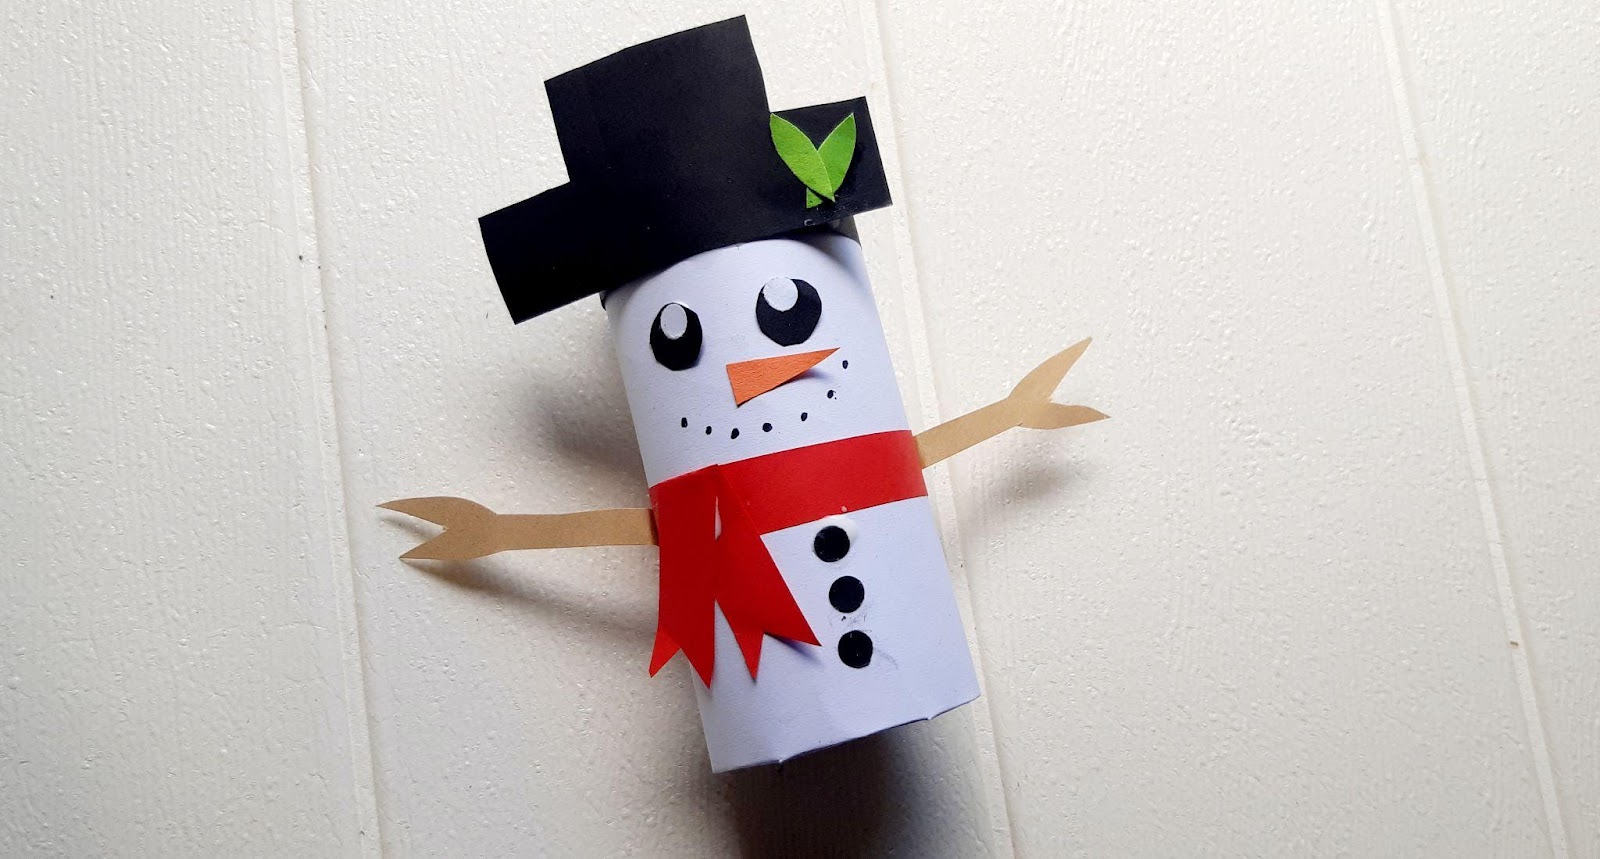
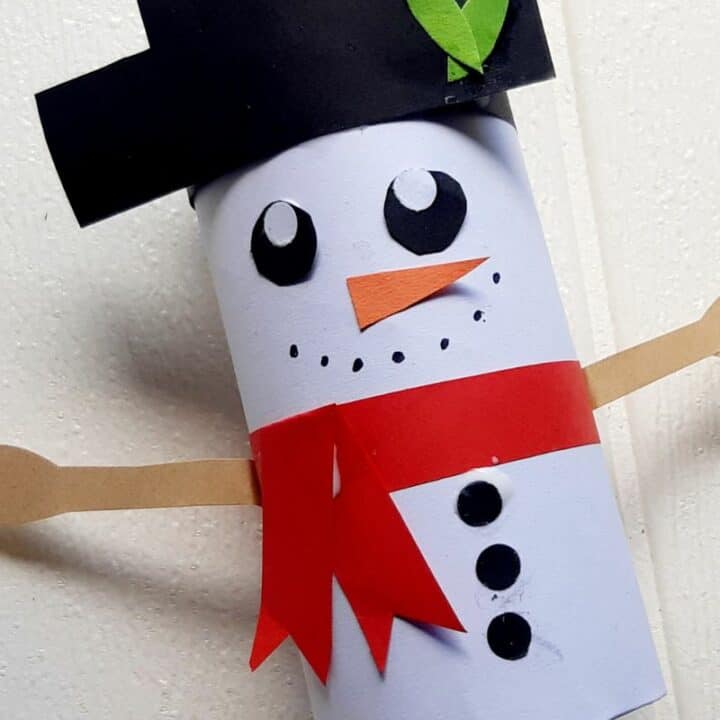
STEP 7: Wrap the paper strip! It will serve as the scarf of the snowman. Now it’s looking more complete!

STEP 8: To complete our paper roll snowman, paste the twigs to each side. Then, draw three buttons below the scarf using the marker.

Why Make Paper Roll Snowmen
Making snowmen out of toilet paper rolls is a great way to spend some quality time with your kids while also getting them excited about the winter season. Plus, it’s a great way to teach your kids about recycling and upcycling.
And if your kids like Frozen, you can pair this craft with a fun sing-along to “Let It Go” or, of course, “Do You Want to Build a Snowman?”
Toilet Paper Snowman
Materials
- Toilet Paper roll
- Markers
- Glue
- Construction paper (black, brown, orange, red, green, and other desired colors)
- White thick paper
- Scissors
Instructions
- Cut a color black colored paper and make a hat with an ornament of green leaves on the side.
- Cut your preferred colored paper strips it will be the scarf of our paper roll snowman.
- Cut a small triangle colored orange paper it will serve as the carrot nose of a paper roll snowman. A brown colored paper is the twigs hands and for the eyes you can paste googly eyes, draw them directly to the paper roll or cut your own preferred eyes for your paper roll snowman.
- Wrap your paper roll with white paper for a smooth texture and to imitate the snow-like feature.
- Glue the Paper roll snowman hat you can add other preferred ornaments to the hat.
- Glue the eyes on the triangle orange colored paper for the nose and using marker put a dotted smile to make our paper roll snowman adorable.
- Wrap the paper strip it will serve as the craft of the snowman.
- To complete our Paper roll snowman put the color brown paper that will serve as twigs arms of our cute snowman and add draw buttons using the marker.